Thursday, January 15, 2015

Disable LanSchool Audio (Speak) Feature on Macs

To disable the ability to listen to the microphone on client computers as well as the ability to speak to client computers follow these steps:


  • Download the installation source from Stone-ware.
  • Launch the lanschool_teacher.dmg and navigate to the Mac > Utilities folder.


  • Double click on DisableAudio.zip to extract the file.
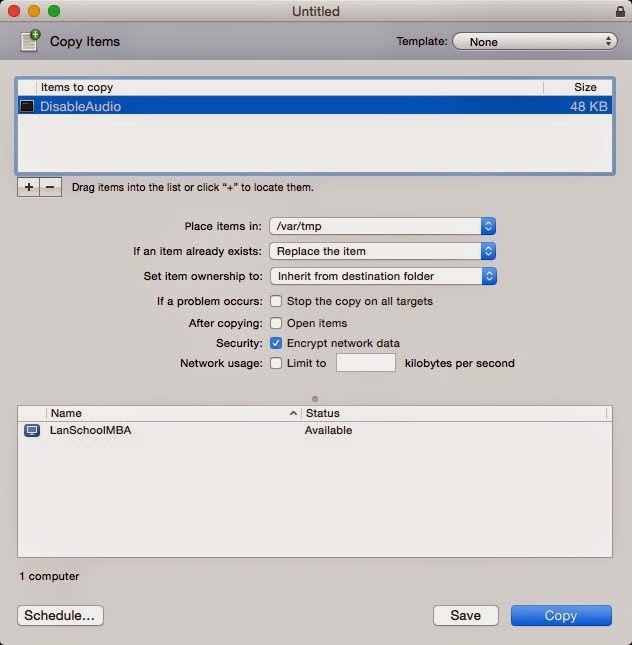
  • Use Apple Remote Desktop to copy the utility to the teacher machines.
  • Copy the utility DisableAudio to the teacher machines.  We use /var/tmp as our location.


  • Run DisableAudio with no parameters to disable the ability to listen or speak with client machines.
  • Use ARD to send a UNIX command to the client to run DisableAudio as root.
  • The teacher will need to quit and relaunch LanSchool for the change to take effect.  The Speak button should now be greyed out in the Teacher console.

Enable the Audio (Speak) Feature


To enable the audio speak feature, we will use the same procedure except for the UNIX command.  This time we want to add the FALSE parameter.


The teacher will need to close and reopen LanSchool for the change to take effect.  The speak button should now be available.

Thursday, October 30, 2014

Adding Keychain Menu to the Mac Menu Bar with Profile Manager

Now that support has all but been dropped for MCX and Workgroup Manager, it is time to start pushing out our settings and customizations with Profile Manager.  I will be making a series of posts on using Profile Manager to apply settings to the menu bar in OS X.

I am using user groups with nested AD users to apply the settings, your environment may be different.

  • Login to Profile Manager
  • Click on Groups and select the group you want to apply settings to.
  • Clic Settings
  • Scroll all the way to the bottom and click on Custom Settings.
  • In the preference domain type com.apple.systemuiserver.plist
  • Under Property list values, type the following in the key field:  /Applications/Utilities/Keychain Access.app/Contents/Resources/Keychain.menu
  • Select String for the type.
  • Click OK.
  • Be sure to click Save to apply the settings.
The clients should have the Keychain menu icon the next time they login.


Friday, October 3, 2014

Add Users to VPP in Meraki

When using Meraki Systems Manager, free apps will push out just fine without being assigned a license.  The users will simply be prompted for their Apple ID and password.  To use managed distribution and deploy paid apps the users have to be invited to VPP.

To invite users to participate in VPP:

1.  Login to Meraki Systems Manager
2.  Go to MDM > VPP
3.  Click the User Management tab
4.  Click +Add User
5.  Enter the name and email of the user.
6.  Check Send invitations automatically and click Save

From the user's iOS device:

1.  Access the user's email account.
2.  Open the invitation email from Meraki.


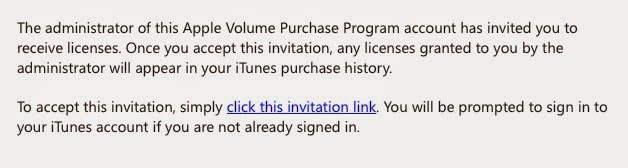
3.  Click the invitation link.
4.  After being redirected to the App Store, agree to the terms and conditions.
5.  Click Ok after the VPP assignment has been confirmed.

Now app licenses should be able to be assigned to individual users for paid apps.

Thursday, September 25, 2014

Add a Web Clip Profile to Meraki Systems Manager

Use these steps if you want to create a new profile with the web clip(s).

Go to MDM > Profiles

Click +Add New > New mobile profile.

Set the scope to assign this to the following devices.

Click Save Settings.

Click Edit Profile Settings

Click Web Clips

Click Create a Web Clip


Fill in the Label field.  This is the text that will be displayed under the icon for the web clip.

Click Save Changes.

The devices should add the Web Clip to the home screen the next time they check in.

Monday, September 15, 2014

VPP Licenses Not Showing Up in Meraki Systems Manager

After purchasing app license from the Apple Education Volume Purchase Program website the licenses should be available via the Systems Manager dashboard under MDM > VPP.  It may take some time for the transaction to be processed after making the purchase.  The license will not be available to Meraki until the transaction has completely processed.

The following steps can be used to force Meraki SM to sync the licenses with Apple VPP.


  • Go to MDM > Meraki
  • Click the Force sync now button on the upper right side of the window.


Once completed, the licenses that have been processed by VPP should now be available.  This process can take some time if you have several thousand licenses to sync.  I have seen it take over 30 minutes to complete with larger installations.

Thursday, September 11, 2014

Recover Data from JVC Everio GZ-MG330HU

Recently I had a client bring me a JVC Everio GZ-MG330HU camcorder that had come in contact with water.  After which it would power on, but display a message that the temperature was too low.  This prevented it from connecting to a computer to download the data since it would power off shortly after the error.

The JVC Everio GZ-MG330HU is a hybrid HDD/micro SD hybrid camera with a built-in 30GB hard drive.

Since this was the first time I had had to recover data from one of these models, I started to take it apart to see what type of hard drive the device was using.  This model had a 1.8-inch Toshiba hard disk drive.  In the past I had managed a fleet of Dell Latitude XT tablets.  The Latitude XT also had a 1.8-inch drive.

To start the recovery process I removed the hard drive from the XT and removed the zif cable.  I then attached the zig cable to the camcorder's hard drive and plugged it into the XT.  Since the drive doesn't have a usable OS, I decided to use Linux Mint on a USB flash drive to recover the data.  After booting into Mint, I was able to see the drive and files immediately.  I attached another external USB drive and was able to recover over 21 GB of data that had been stored on the drive.

There are other types of adapters that could be used, but I happened to have one of these on the shelf, saving me the time and money of ordering an adapter.

Monday, September 8, 2014

Silently Install iOS Apps with Meraki to an iPad Cart

A bit of background for this post.  I work for a quickly growing school district on a team that manages around 4000 Macs, iPads and Chromebook.  We have approximately 1200 iPads that are in carts for each grade level to use.  We needed a method to silently push the apps to each of the carts.  The method we chose was to create a different Apple ID for each cart at each school and use Apple's VPP Managed Distribution.

NOTE:  You will need to invite the user accounts via VPP before proceeding.  Follow my previous post here for instructions.
  1. Purchase the paid or free apps via the Apple VPP website.
  2. Go to meraki.com and login to your Systems Manager dashboard.
  3. Go to MDM > VPP
  4. Click the Licensed Applications tab if it isn’t already selected.
  5. Check the name of the app you want to assign to an Apple ID.
NOTE:  If the app you are looking to assign is listed, but has been purchased from the Apple VPP website, you may need to sync the Apple API.  Click the Force sync now button in the upper right of the window.
  1. Check the box next to the user(s) (Apple IDs) you want to assign the app to.
  2. Click Grant license to user(s)
Now that the license has been granted, we need to assign the app to the devices.
  1. Go to MDM > Apps
  2. Click + Add new > iOS App
  3. Search for the app.
  4. Click Add next to the app to be assigned.
  5. Set the scope to select which devices should receive the app.
  6. Click Save
OPTIONAL:  We usually check the box next to Remove with MDM.  This way if a user removes the management profile, the apps will also be removed.