Thursday, March 28, 2013

Export Trust and Enrollment Profiles - Part 3

Part 3:  Export Trust and Enrollment Profiles

Now that Profile Manger has been setup we need to prepare for device enrollment.  I prefer to use Apple Configurator to prepare and enroll the iOS devices, then manage them with Profile Manager 2.  Before we prepare and enroll the devices we need to save the trust profile and enrollment profile from Profile Manager.

Setup

This setup assumes that you have Profile Manger 2 configured and have installed Apple Configurator.  If you have not setup Configurator, it can be downloaded for free from the Mac App Store.

I would perform the following steps from the computer that Configurator is installed on.

Download Trust and Enrollment Profiles

1.  Log into Profile Manager 2 with an account authorized for Profile Manger.


2.  Click on your username in the upper right corner of the Profile Manger page.


3.  Click Download Trust Profile.  The trust profile will now be saved to your Downloads folder.  We will use this shortly.


4.  Click on the + in the lower left corner of Profile Manger 2 and click Enrollment Profile.  A new enrollment profile will now be created.

5.  Click on the title New Enrollment Profile and type the name of the enrollment profile.  I usually use the name of my organization.  i.e. MySchool Enrollment Profile


6.  There is a checkbox to Restrict use to devices with placeholders.  If you leave this checked you will need to use the Devices library to prestage your devices.  If it is unchecked any device can use this profile to join your PM2 server.

7.  Click Save, and confirm by clicking Save.


8.  Next click the Download button to download your enrollment profile to the Downloads folder.

NOTE:  10.7 and 10.8 may ask you if you want to enroll your Mac after the download is complete.  Since we are using this for our iOS devices, click Cancel.

We now have the profiles we need to enroll iOS devices in Profile Manger.

Wednesday, March 27, 2013

Setup Profile Manager 2

This post will cover setting up Profile Manager 2 on OS X 10.8.2.

Profile Manager 2 is a free MDM solution included with version 2 of Apple's Server app for OS X 10.8.  While the Server app may be $19.99 on the Mac App Store, there are no other licensing costs.

As I said in my previous post, I would like to see Apple improve a few minor things, but overall this is a solid MDM solution for managing iOS devices.

Setting up Profile Manger 2

Requirements

OS X 10.8
Server version 2*

*(I recommend version 2.2.1 which is the most recent and adds the ability to delete apps after they have been uploaded to Profile Manger.)

1.  After installing and updating OS X 10.8 download OS X Server version 2 from the Mac App Store.

2.  Open the Server app, click Continue and Agree to the licensing agreement.


3.  Check that the hostname is correct, click Continue.

4.  Enter the AppleID you would like to use for Push Notifications, click Continue.

5.  The Server app will now take a couple of minutes to setup the service.  Click Finish when it has completed.

6.  The Server app should now open and display the computer information as well as a list of the services.  Click on the Profile Manager service and turn it On.


7.  After Profile Manger starts, click on the Configure button.

8.  Click Next to begin Profile Manger setup.

9.  Profile Manager needs a configured network directory.  Click Next to begin setting up Open Directory.


10.  Enter a password for your Directory Administrator account and click Next.

11.  Enter the name of the organization as well as the administrator's email address and click Next.


12.  Verify that the settings are correct and click on Set Up.  Server will now create an Open Directory master.

13.  After Open Directory has been set up, you will be prompted to select an SSL Certificate for web services.  For this example we are going to use a self-signed certificate.


14.  Click on the Certificate drop down and select your certificate.  Click Next.

15.  If you receive a green circle with a checkmark your server has been set up.  Click Finish.


16.  To access Profile Manager click on the Open Profile Manger link and log in with your administrator account. **

**Active Directory accounts will work, but the server must be joined to an Active Directory domain and given access to manage the service.

17.  Profile Manger has now been configured.

Next I will be covering how to work with Profile Manager, trust profiles, and enrollment profiles.

Prepare Configurator for Profile Manager 2 Enrollment - Part 4

I was excited when Apple announced the availability of Apple Configurator last year.  Finally, an alternative to configuring and imaging with iTunes.  Configurator does a decent job preparing and setting up iOS devices.  It is the day-to-day operations where I feel it struggles.  For example, updating iOS and apps.

Configurator added the ability to manage app licenses purchased from the VPP store.  I really liked the ability to view how many licenses we consumed and which device they were assigned to.  The problem was, we would have licenses that would show they had been consumed when they had never been assigned to a device.  After they are consumed they cannot be assigned to another device, except through the unsupervise task.  This is also a problem if a device is bricked or unable to be connected to Configurator due to damage.

Our school district wanted the devices to be supervised so we could restrict some of the features.  While supervision is nice for resetting features and settings, it is problematic when photos and videos have been taken on the device as they get removed when refreshed.

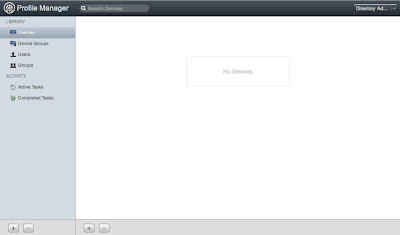
After looking at Profile Manager 2 we decided that a mixed deployment model would be better.  We use Configurator to prep the devices and enroll them in Profile Manager, which is then used for ongoing management.

I will be posting the steps for this deployment model over the next week.  This article will cover the initial preparation of Configurator.

Requirements

OS 10.7.5
Configurator 1.2.1
iOS Device

Setup

1.  Download and install Configurator 1.2.1 from the Mac App Store.

2.  Launch Configurator, accept the license agreement and click Start Preparing Devices to begin.


3.  We are starting with the prepare tab.  Enter the name you would like for the iOS device(s) in the Name field.

4.  If you are preparing multiple devices, add a number to the end of the name and check the box Number sequentially starting at #.

5.  Depending on your management model, I would recommend turning Supervision On.  Our iOS devices are all cart based so we want control over the apps and settings.

6.  The iOS drop down should automatically change to Latest.

7.  At this time we don't have a backup to restore.  Leave this set to Don't Restore Backup.
8.  Click on the + to create a new profile.


9.  The General profile settings should now be visible.  Enter a name for the profile such as iPad Lab Wireless Profile.  This profile is just to get the device on the network.  The rest of the profiles will be OTA from Profile Manger.  Enter your organization name and a brief description.


10.  On the right side of the General profile, scroll down to Security and change Always to With Authorization.  Enter a password to control removal of the profile.


11.  Select the Wi-Fi profile and click Configure.   Input your wireless settings and click Save.


12.  Check the box for the profile that we just created.

13.  Click on the Apps tab.  Click on the + and navigate to your Mobile Applications folder.  This is located in your home directory under the iTunes folder.
  • ~/Music/iTunes/iTunes Media/Mobile Applications
  • If there aren't any apps listed, you need to go to iTunes and download them from the iTunes App Store.
  • If you have apps purchased with multiple Apple IDs, you will need a free app from each account.
14.  Select a free app and click Open.  Place a check next to the app we just added to Configurator.


15.  Switch back to the Settings tab, make sure your iOS device is connected and click Prepare.


**Clicking Prepare will wipe your device.  Just a warning.**

16.  A warning will appear  confirming that you want to apply the settings to ALL USB-connected devices.  This would be a good time to make sure your iPhone isn't plugged into the Configurator computer!  If you are ready click Apply.


17.  Configurator will begin preparing the iOS device.  This process may take a while as it has to download the latest version of iOS.

18.  When Configurator has finished prepping the device turn it on and go through the iOS setup screens.  Your wi-fi should connect automatically if everything was correct in the profile created earlier.

19.  Reconnect the iOS device to Configurator.  It may refresh automatically, which is fine, just wait for it to complete before continuing.

20.  We are now going to create a backup of the iOS device so some of the prompts will be suppressed.  You could also use this to customize folders and other settings.  This is our "image."

21.  Click on the Supervise tab.  Click on the name of the iOS device we just configured.

22.  Click on the Restore drop down and go to Backup.  Enter a name for your backup (i.e. iPad Backup 3-27) and click Create Backup.

This concludes preparing Configurator.  The next post will pick up from here with instructions on enrolling devices in Profile Manager with Configurator.

Tuesday, March 26, 2013

Profile Manager 2


Apple's first version of Profile Manager (OS X 10.7, Server v1) was more like a pre-release version. It didn't work that well and there really weren't many features that made it worth the install time.  However, Profile Manager 2, which is included in OS X Server version 2, provides a great management tool for iOS devices.  It also provides management of Mac clients, but I have found that it just isn't reliable enough for day-to-day management of Macs.  I prefer to stick with MCX for my Macs until it is improved.


Profile Manager allows you to create a group of iPads and assign profiles and apps to the group.  The profiles and apps are then pushed out over the air to the devices.  Profiles install automatically while the apps require the user to click Install when prompted.

I list more complaints than good features below.  I do believe that the good outweighs the bad, though.

Features

  • Over-the-air updates to profiles.
  • Over-the-air app installation.
  • Group device management.
  • Remote device management - Lock and wipe lost devices.

Complaints

There are a few items I would like to see Apple improve in the next version:
  • Sorting apps uploaded to Profile Manger
  • Currently apps are sorted by the day they were uploaded.  Allowing them to be sorted alphabetically be much more efficient.
  • Names displayed for Apps
  • The apps are listed by the file name of the apps, not the title of the app.  For example, an app may show up in iTunes as Alphabet, but the file name of the app may be abc.app.  This can be confusing for users who are looking for the title of the app.
    • Allow Restrictions on Profile Manager Admins
    • Currently, any user who can login to the Profile Manger management page can see all of the devices, settings and apps.  It would be nice to have different management users/groups that devices can be assigned to.  For example, we have iOS devices in our elementary, middle school as well as our SPED department.  Since each area has a different manager, I have created multiple Profile Manger servers.
    • Allow Uploading Multiple Apps
    • Unfortunately the .ipa files have to be uploaded one at a time.  Not a big deal if you only have a handful of apps.  However, some of our buildings have 150+ apps!